Category: Photograph

Fun with PhotoDoc: Infrared (Edition 7)

Fun with PhotoDoc: Infrared (Edition 7)

At the end of last year the lab purchased a modified UV-Vis-IR Nikon through MaxMax so that we can start to play around with infrared photography.  Infrared photography (IR) is commonly used in fine art conservation as an examination tool.  Reflected IR can be helpful when trying to identify pigments, inks, coatings, etc. and transmitted IR can helpful for viewing watermarks, underdrawings, and linings. We’ve only just started dabbling with IR photography, but I wanted to share some photos from my most recent session with reflected IR.
This is a full leather photo album from the Public Library of Cincinnati & Hamilton County’s collection.  This early 1900s photo album contains hand-colored silver gelatin photographs taken by A. Nielen.   The photographs appear to depict his travels through the US and Canada, and various landmarks and neighborhoods of Cincinnati are represented.

This seemed like a good object for reflected IR because of the hand-coloring on the photographs and the white ink inscription below each photograph.  I began by taking a representative visible light image (first image below) using our modified UV-Vis-IR camera, incandescent lighting, and the X-Nite CC1 filter on our 50mm lens.  Then, being careful not to move the position of the camera or the object, I switched to the X-Nite 830 filter (830nm) and converted that image to grayscale in Photoshop (second image below).  Then I took my visible light image and my reflected IR image into Photoshop to create the false-color image (third image below).  The digital false-color image is a combined representation of the visible and infrared images, and it’s actually quite simple to make.  You basically copy and paste the various channels for the VIS and IR image as follows, green to blue, red to green, and IR to red.  The false-color image allows you to better differentiate and characterize the various materials (pigments, inks, etc.) and potentially even identify them if you have sufficient known samples to use as references.

Like I said, we’ve only just started using IR and we’ve got a long way to go, but I’m looking forward to experimenting and learning more about it as time goes on.
Jessica Ebert (UCL) – Conservation Technician

Fun with PhotoDoc – Edition 4

Fun with PhotoDoc – Edition 4

The amazing enclosure made by our very own conservation technician, Chris Voynovich, for volume 1 of the W.S. Porter Collection.

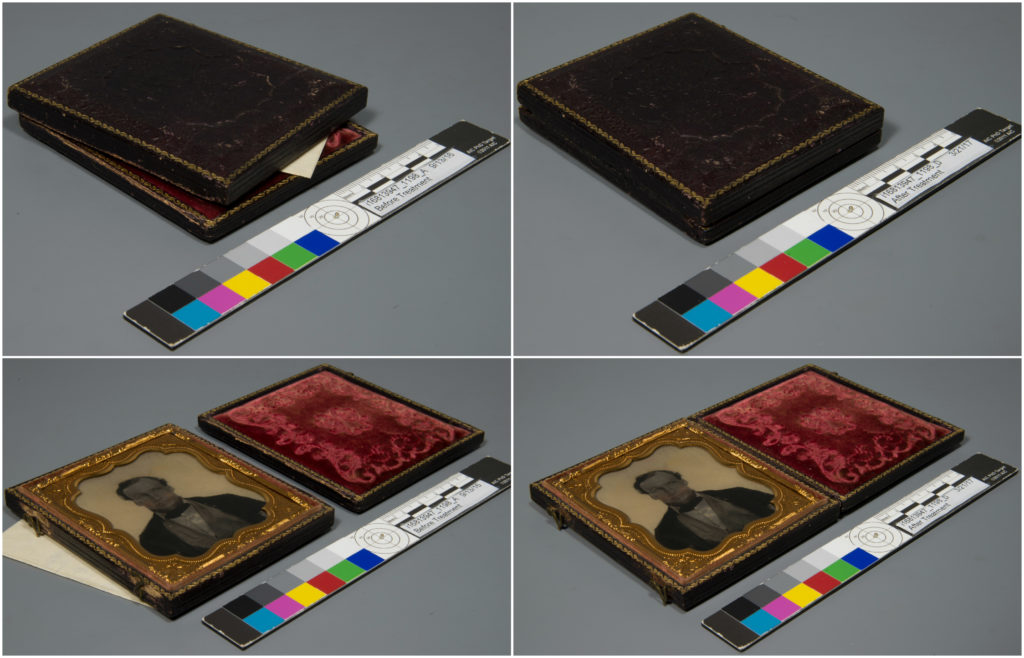
We very recently returned a two volume collection of photographs taken by William S. Porter, known as the W.S. Porter Collection, to the Public Library.  William S. Porter is known in Cincinnati as one of the two photographers responsible for the 1848 Cincinnati Panorama (you can read more about and even explore this amazing daguerreotype panorama here). Volume one of the collection consists of 7 cased photographs (including daguerreotypes, ambrotypes, and tintypes) and 1 non-cased tintype, all reportedly taken by W.S. Porter, while volume 2 consists of one framed daguerreotype of W.S. Porter and a preservation print of that photograph.  When these photographs arrived in the Lab for treatment, many of the cases were damaged (especially along the spine – some broken completely, one previously “repaired” with tape, etc.), the framed photograph needed re-packaging, and the collection needed two custom enclosures (vol. 1 & 2) to safely store all the photographs.
(Left) Before “bench” photos of one of the cased photographs labeled “John Wesley Lever”, (Right) After photos of the mended case.

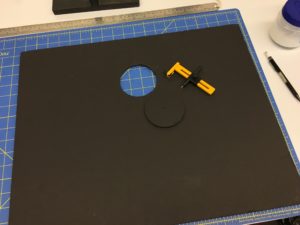
Now, as anyone who does photographic documentation will tell you, taking treatment documentation photos of photographs is a pain, especially on the copy stand (i.e. from above) and especially when you were trained in-house in a book and paper lab.  Glass objects just aren’t as common around these parts.  During PhotoDoc glass just acts as a mirror, reflecting all your light and even your camera lens and obstructing the actual photograph you are trying to capture.  But we knew that we wanted some good quality photos of the photographs to print as surrogates and to also use in the enclosures.  Black foam core and an Olfa rotary cutter to the rescue!  Using these two supplies I created a non-reflective black surface to place around the camera lens to help reduce reflections and absorb light.
In order to mount this black foam core on the camera lens I measured the diameter of our lens and the distance from the edge of the lens to the neck of the copy stand when the camera was in place.

The foam core allows enough flexibility for the deflector to just slide past the UV filter and snap into place securely.


With the black non-reflective board in place, I was able, with guidance from our conservator, to get some pretty good shots of the photographs to be used as surrogates.  The photos were also printed out and attached to the back of individual tuxedo boxes for each cased photograph.  Instructions to “store face down” were placed on the front of each tuxedo box to assist patrons in proper storage.  (The glass on all of these photographs is degraded and if stored face up the glass can actually weep onto the photograph causing significant damage, therefore cased daguerreotypes/ambrotypes/tintypes are generally stored up-side-down to prevent further damage to the actual photograph).  All of the tuxedo boxes for volume 1 were housed within a two-tiered clamshell box with two removable trays made by our resident “Box Master”, Chris Voynovich.  It should be noted that it’s a miracle this enclosure made it out of the lab and back to the Public Library, because several staff members were so enamored with it and thought it would make the best jewelry box!  I mean, it kind of would, wouldn’t it?
Here are the images I was able to obtain using my homemade non-reflective board:

Jessica Ebert (UCL) – Conservation Technician
Fun with PhotoDoc – Edition 1

Fun with PhotoDoc – Edition 1

Since I am the conservation technician who carries out most of the photographic documentation in the lab I think that pretty much all PhotoDoc is fun.  With all the different tools in the toolbox it really doesn’t get much better than when you get to bust out the ultraviolet radiation to reveal something that is otherwise not so obvious under normal illumination (like a stain, handwriting, etc.).  And then when you can transform those normal and UV before photos into a gif…well, that just makes for a fun Friday, if you ask me!

classphoto_uv_gif
This photograph is part of the Henry R. Winkler Center for the History of the Health Professions collection and arrived in the lab with the original glass broken and partially attached to the photo. It is obvious under normal illumination that the photograph endured some kind of spill or water damage, but under UV florescence you can better make out the path that the water or perhaps beverage created and even note splotches of possible mold damage (which flourese purple).  Now that’s it’s photographed I’ll turn it over to Ashleigh, our conservator, to determine what’s happened to this poor thing and the best course of action when it comes to treatment and storage.

Jessica Ebert (UCL) – Conservation Technician

A Simple Solution for Lantern Slides

A Simple Solution for Lantern Slides

This October the Preservation Lab arranged for staff training in photograph conservation with an expert in this specialty to help us address specific needs for the two institutions.  The lab hosted a 3-day workshop taught by Photograph Conservator, Tom Edmondson.  Lab staff and two other local paper and book conservators attended.  We were taught how to identify more than 16 types of historic photographic processes.  We learned how to safely preserve and store a variety of formats, including daguerreotypes and lantern slides. Using actual historical photographs as learning opportunities we were taught basic and advanced treatment techniques such as surface cleaning photographs, washing, removing linings, flattening creases, and matting.  The technicians have already begun to implement the knowledge gleaned from the workshop in the treatment of some Public Library lantern slides.
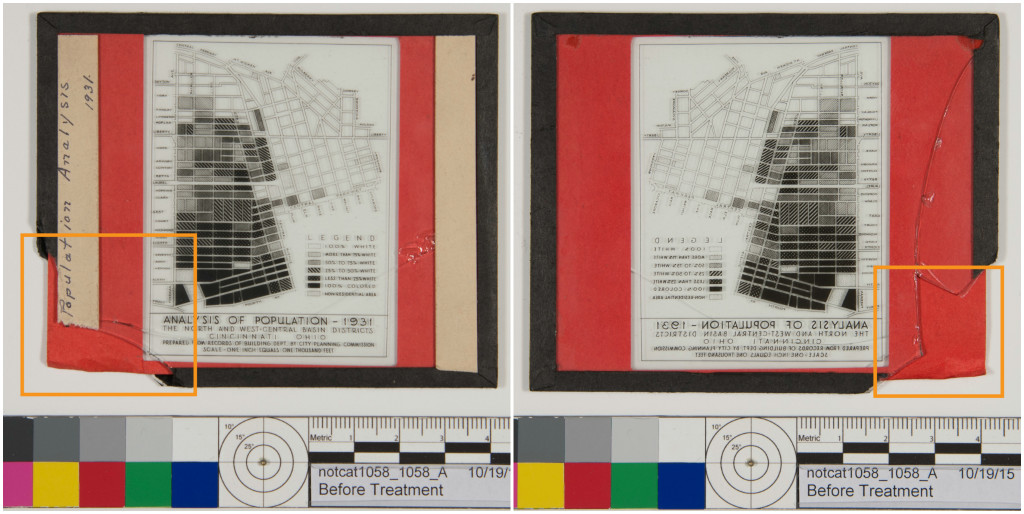
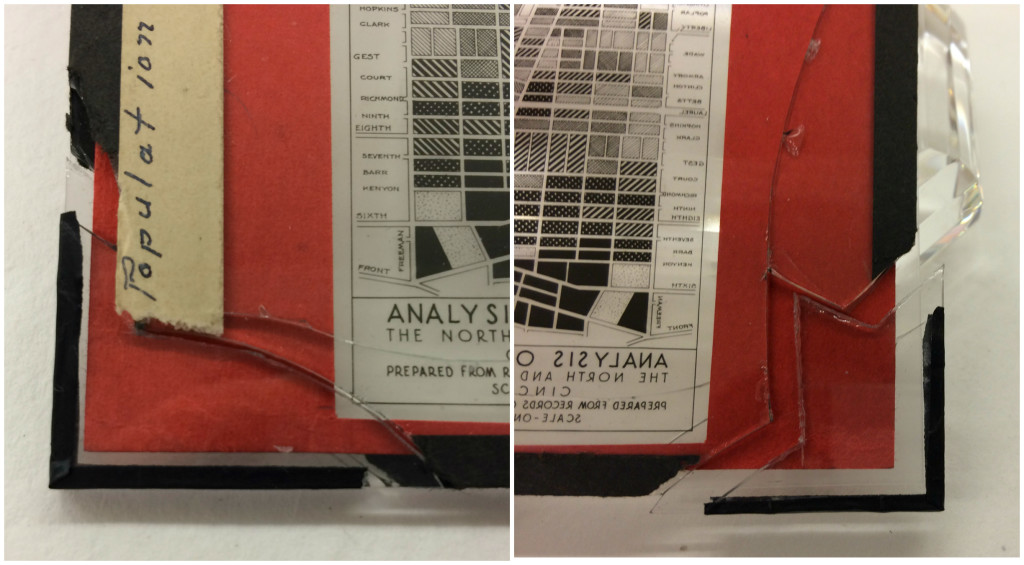
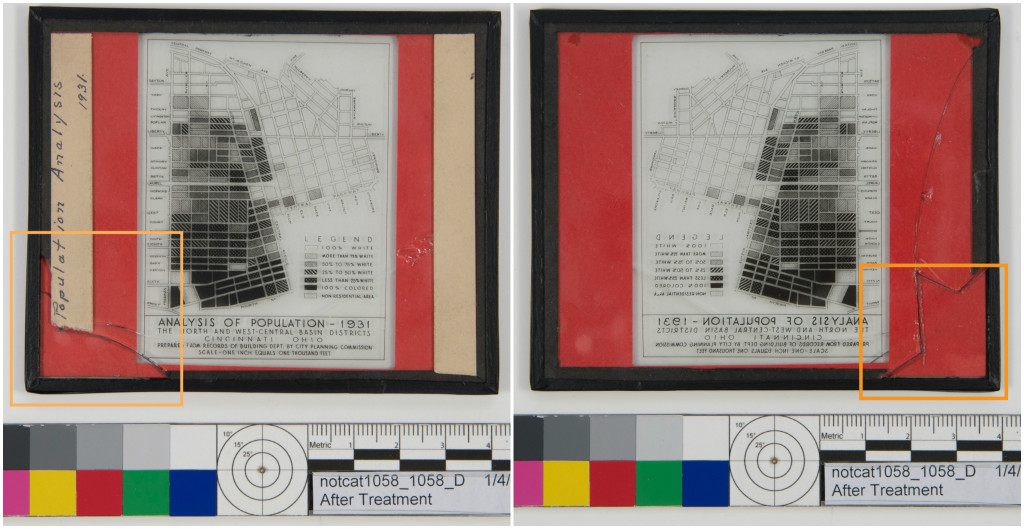
For example, with the lantern slide below the losses on the glass were filled with Vivak in order to prevent further damage.  Vivak, a clear thermoplastic sheet, was chosen since it is archival, looks similar to glass and is an easy material to cut and shape without losing its structural integrity.The Vivak was precisely cut and placed onto the missing areas.
The Vivak was precisely cut and placed onto the missing areas.

Collage3
Detailed images of the Vivak fills. Verso and recto pieces were secured together with a strip of Filmoplast R.

To attach the recto and verso of the Vivak fill pieces to each other, a strip of Filmoplast R was used around the edges. Filmoplast R, a cellulose tissue coated with an acid and solvent free heat-activated adhesive, was toned with Golden fluid acrylics to match the original paper strip around the edges of the lantern slide.
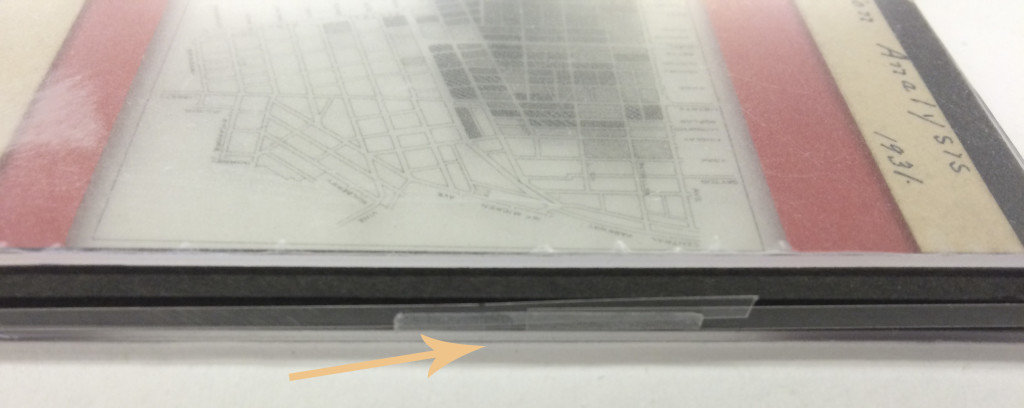
To protect the edges of the lantern slide, and to secure the filled areas in place, a strip of Mylar (polyester film) was placed along the edges and secured with a small piece of Filmoplast R.
The strip of Mylar around the edges of the lantern slide will also work as a barrier between the edges of the original object and Filmoplast R adhesive.

Finally, the lantern slide was sandwiched between two pieces of Vivak and secured with a strip of toned Filmoplast R by wrapping it around the edges.Collage2
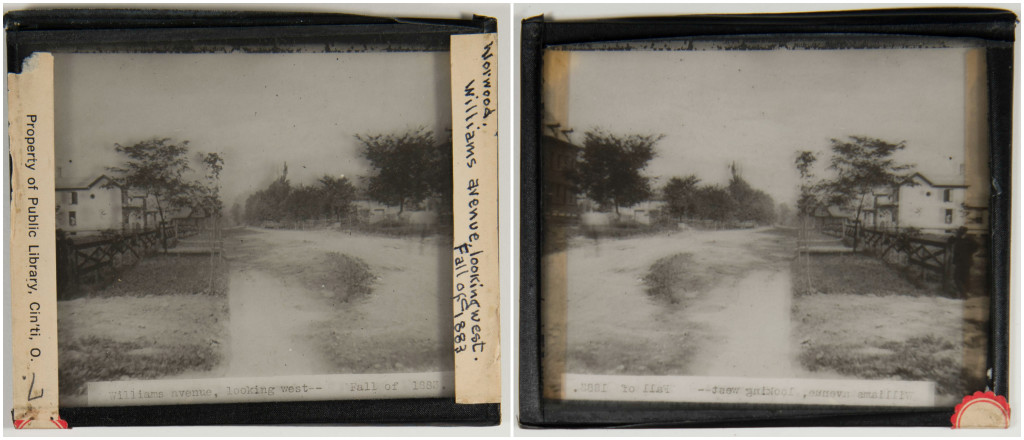
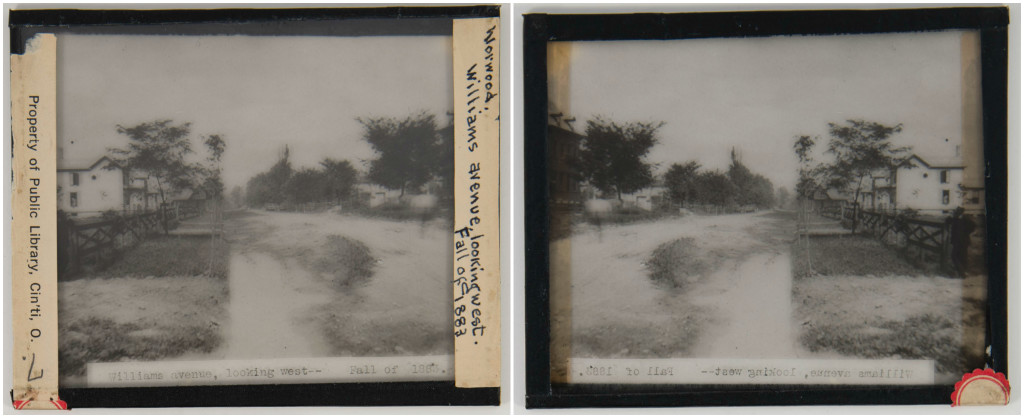
With another lantern slide, the original plastic coated paper strip around the glass plates was lifting and detaching from the glass.Collage4
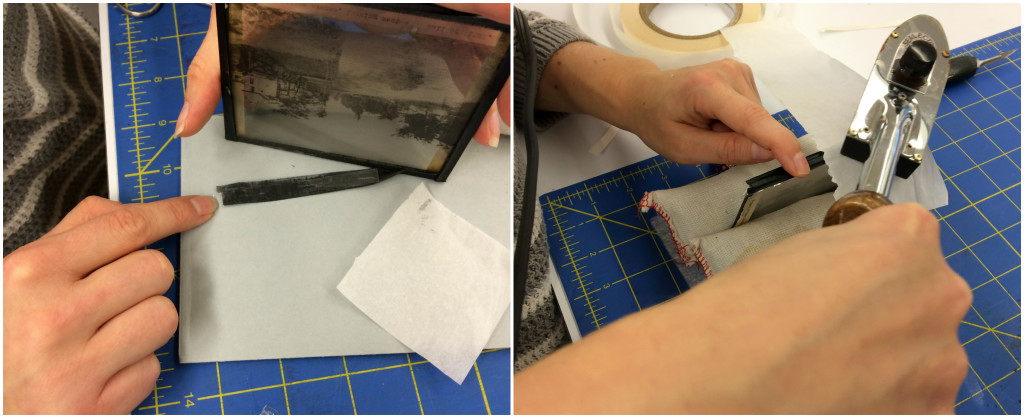
The detached black strip was mended and adhered in place with the heat activated adhesive BEVA film 371, and a tacking iron.Collage6
Since this lantern slide was not broken and the paper was mended, there was no need to sandwich the lantern slide between pieces of Vivak.

This project was a great opportunity to learn and work with different materials.
 
Ashleigh Schieszer (PLCH) — Book and Paper Conservator, Author
Catarina Figueirinhas (UCL) — Sr. Conservation Technician, Author & Photographer
Jessica Ebert (UCL) — Conservation Technician, Photographer